
Retired police vehicles—primarily the Ford Police Interceptor Utility (FPIU), Chevrolet Tahoe PPV/SSV, and Dodge Charger Pursuit—are among the most popular targets at government asset liquidations. Law enforcement fleets are maintained under strict preventive schedules, offering buyers heavy-duty components, upgraded cooling systems, and powerful V6 or V8 engines at wholesale prices.
However, police units experience aggressive driving, high engine idle times, and specialized equipment removals that require targeted inspection strategies. This guide covers how to inspect and evaluate retired law enforcement vehicles before placing a bid.
1. PPV vs. SSV: Understanding Police Vehicle Classifications
Before bidding, verify the exact police package designation in the auction catalog:
-
PPV (Police Pursuit Vehicle): Engineered for high-speed pursuit and emergency response. Features lowered or heavy-duty suspension, upgraded brake calipers and rotors, high-output alternators, engine oil coolers, and calibrated speedometers.
-
SSV (Special Service Vehicle): Designed for off-road, utility, administrative, or specialized tactical use (such as park rangers or K9 units). Usually maintains standard civilian ride height, 4WD/AWD transfer cases, and higher towing capacities.
2. Key Inspection Areas for Retired Police Units

During auction preview days, prioritize these three specific police-fleet problem areas:
+-------------------------------------------------------------------------------+
|                       POLICE UNIT PREVIEW CHECKLIST                           |
+-------------------------------------------------------------------------------+
| [Center Console Gap]  --> Check for missing factory shifters / exposed wiring |
| [Roof & Trunk Plugs]  --> Inspect rubber plugs for water seal integrity        |
| [Cooling Package]     --> Check auxiliary coolers for damage or leaks         |
| [Rear Doors & Locks]  --> Test inner door handles and power window switches   |
+-------------------------------------------------------------------------------+
A. The Center Console and Wiring Loom
Police departments install heavy computer mounts, radio stacks, and siren controllers between the front bucket seats.
-
The Missing Console: When uninstalled, an open gap remains between the driver and passenger seats. Factor in $100–$300 for an aftermarket or factory civilian center console replacement.
-
Electrical Cutouts: Ensure equipment was removed by unplugging factory harnesses rather than cutting through main wire looms, which causes electrical shorts or battery drains.
B. Roof and Trunk Spotlight / Antenna Holes
Emergency lighting, lightbars, and radio antennas are unbolted before public liquidation.
-
Rubber Plugs and Silicon Seals: Inspect hole plugs along the roofline, trunk lid, and A-pillars. Poorly sealed antenna holes lead to water leaks, ruined headliners, and floor pan rust.
C. Rear Door Locks and Window Switches
Many law enforcement agencies disable interior rear door handles and window controls for security reasons.
-
Deactivated Controls: Check whether rear window switches and internal door latches function. Re-enabling them usually requires reconnecting internal door rods or flipping child-safety lock toggles inside the door jamb.
3. Platform-Specific Mechanical Checkpoints
| Vehicle Model | Common Engine | Primary Mechanical Checkpoint |
| Ford Police Interceptor Utility | 3.7L V6 / 3.5L EcoBoost / 3.3L V6 | Internal water pump seal integrity; PTU transfer case fluid condition. |
| Chevrolet Tahoe PPV | 5.3L V8 (EcoTec3 / Vortec) | Active Fuel Management (AFM) lifter ticking; transmission fluid color. |
| Dodge Charger Pursuit | 5.7L HEMI V8 / 3.6L Pentastar V6 | Camshaft/lifter wear ("HEMI Tick"); plastic oil filter housing leaks. |
4. Reconditioning Budget Expectations
When calculating your maximum bidding ceiling for a retired police unit, budget for these common post-auction reconditioning items:
-
Adhesive Removal & Paint Touch-Up ($100 – $300): Removing vinyl agency door wraps leaves glue residue or minor paint ghosting that requires solvent cleaning and machine polishing.
-
Fresh Battery ($120 – $220): High auxiliary electrical loads (radios, dash cams, spotlights) degrade batteries quickly.
-
Fluid Flushes ($150 – $300): Immediately change engine oil, coolant, and differential/transfer case fluids to reset maintenance intervals.
Summary Action Steps for Bidders
-
Verify Idle Hours: Always check digital engine idle hours in the instrument cluster alongside odometer mileage.
-
Inspect Equipment Holes: Confirm roof, trunk, and pillar hole plugs are watertight.
-
Budget for Interior Civilianization: Account for center console replacements and rear door lock adjustments in your final all-in budget.
Converting retired commercial vans, utility vehicles, and government transport units into personal camper vans or mobile work rigs has become one of the most popular uses for public auction assets. Government agencies, school districts, and municipal public works departments routinely offload cargo vans, passenger shuttles, and box trucks that serve as excellent foundation platforms for custom camper builds.
Purchasing a camper conversion base through a public liquidation offers substantial savings compared to buying from commercial dealerships, but camper builders must evaluate vehicle dimensions, electrical configurations, and mechanical weight capacities before bidding.
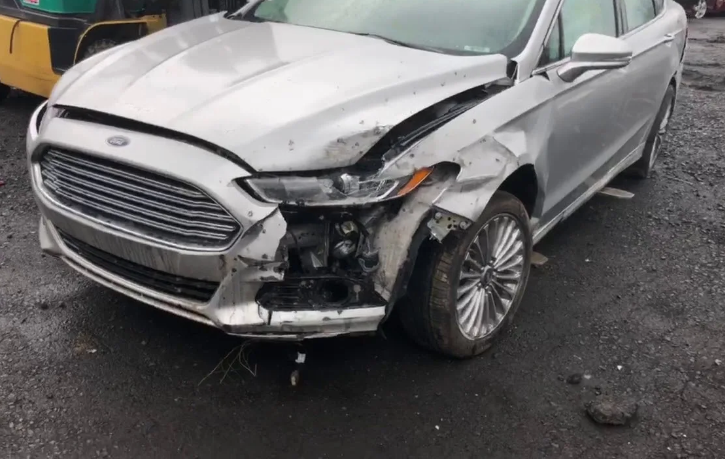
1. Top Auction Platforms for Camper Van Conversions
Selecting the right vehicle chassis determines your interior layout, payload capacity, and off-grid capabilities:
+-------------------------------------------------------------------------------+
|                      POPULAR AUCTION CONVERSION PLATFORMS                      |
+-------------------------------------------------------------------------------+
| [Ford Transit / High Roof]     --> Standard standing room; easy gas maintenance|
| [RAM ProMaster]               --> Widest cargo box (transverse bed layouts)   |
| [Chevrolet Express / GMC Savana] --> Body-on-frame durability; V8 towing power  |
| [Freightliner / Sprinter 2500] --> Diesel fuel economy; high roof clearance   |
+-------------------------------------------------------------------------------+
A. Ford Transit (Mid & High Roof)
-
Why it's popular: Available in multiple roof heights and wheelbases, with widely available parts across North America. The gasoline 3.7L V6 and 3.5L EcoBoost engines are familiar to most mechanics.
-
Auction Source: Retired municipal delivery units, administrative transport fleets, and public utility vans.
B. RAM ProMaster
-
Why it's popular: Its Front-Wheel-Drive (FWD) layout eliminates a rear drive shaft, allowing for a lower floor height and a wider cargo box. The square interior walls make insulation and cabinetry installation easier.
-
Auction Source: Local health department mobile clinics, code enforcement units, and city delivery fleets.
C. Chevrolet Express / GMC Savana (Full-Size Cargo)
-
Why it's popular: Built on a heavy-duty body-on-frame chassis with robust V8 engines (5.3L / 6.0L). Excellent for rugged overland builds or heavy camper interiors.
-
Auction Source: Water utility departments, park ranger fleets, and public works service vans.
2. Critical Build Metrics: Payload Capacity and Gross Vehicle Weight Rating (GVWR)
The most common engineering mistake camper builders make is underestimating the weight of building materials, water tanks, batteries, and living gear.
-
GVWR (Gross Vehicle Weight Rating): The maximum total allowable weight of the vehicle, including the chassis, fluids, passengers, cargo, and interior build-out.
-
Payload Capacity = GVWR − Curb Weight: This represents the exact weight allowance remaining for your interior build (framing, solar setup, freshwater tanks, insulation, and cabinetry).
| Vehicle Class | Typical GVWR | Payload Allowance for Build | Recommended Camper Build Type |
| Half-Ton (1500 Series) | 6,000 – 7,200 lbs | 1,200 – 1,800 lbs | Minimalist build (light plywood, portable power station, soft storage). |
| Three-Quarter Ton (2500 Series) | 8,500 – 9,500 lbs | 2,500 – 3,500 lbs | Full camper conversion (fixed bed, freshwater system, basic solar bank). |
| One-Ton (3500 Series / Dually) | 10,000 – 13,500 lbs | 4,000 – 6,000+ lbs | Heavy-duty build (hardwood, shower units, heavy battery banks, towing gear). |
3. Pre-Bidding Inspection Checklist for Camper Builders
When evaluating a fleet van on preview day, inspect these specific conversion checkpoints:
-
Roof Integrity and Hole Count: Government service vans frequently feature roof-mounted ladder racks, emergency strobe lights, or radio antennas. Check for drill holes or rust spots on the roof panel that require welding or marine-grade sealant patches.
-
Interior Floor Condition: Pull up rubber cargo mats to inspect the metal floor pan for structural rust, especially near wheel wells and rear door sills.
-
Auxiliary Electrical Equipment: Many public utility vans feature secondary alternators, heavy-duty inverter wiring, or factory auxiliary batteries—components that can save you hundreds of dollars when setting up your camper's off-grid power system.
-
Rear Door Window Configurations: Decide whether you prefer a "Window Van" (better visibility, more natural light, but less thermal insulation) or a "Panel / Cargo Van" (easier insulation, better privacy, easier wall panel mounting).
4. Administrative and Titling Challenges: Van to RV Reclassification
Registering a former commercial or municipal van as a personal vehicle or Recreational Vehicle (RV) requires specific administrative steps:
-
Commercial to Personal Title Reassignment: Some state motor vehicle departments initially title cargo vans under commercial classifications, which carry higher registration fees and insurance premiums.
-
RV Reclassification Requirements: To reclassify a cargo van title to a "Motorhome" or "RV" status (which significantly lowers insurance costs), many jurisdictions require proof that the vehicle contains permanently installed living amenities, such as:
-
A fixed cooking facility (built-in stove or cooktop).
-
A permanent refrigeration unit.
-
A self-contained toilet system.
-
An internal 110V–125V electrical system or shore power hookup.
-
A permanently installed freshwater supply system.
-
Summary Action Steps for Camper Van Bidders
-
Calculate Build Weight First: Choose a 2500 or 3500 series chassis if you plan to install fixed cabinetry, water tanks, or solar battery systems.
-
Inspect the Cargo Area Floor and Roof: Factor roof hole repairs and floor rust remediation into your conversion budget.
-
Verify Local RV Reclassification Laws: Check your state or regional motor vehicle guidelines to understand what amenities are required to re-title a commercial fleet van as an RV.
When evaluating retired police cruisers, municipal sedans, and state utility trucks at government auto auctions, relying solely on the odometer reading can lead to severe valuation errors.
Public fleet vehicles spend a significant portion of their operational lifecycle idling—powering emergency lights, air conditioning, heating, radios, and onboard computers while stationary. Understanding how to read, calculate, and evaluate Engine Idle Hours alongside mileage is essential for determining a vehicle's true mechanical wear.
1. The Physics of Engine Idling: What Happens When a Vehicle Sits
While a vehicle is idling, the odometer does not register miles, but the engine is actively running. Idling imposes unique mechanical wear patterns on internal engine components:
-
Low Oil Pressure and Oil Starvation: At low idle RPM (600–800 RPM), engine oil pumps operate at lower pressure. Over extended periods, upper valvetrain components—such as camshaft lobes and hydraulic roller lifters—receive reduced lubrication.
-
Fuel Dilution in Crankcase Oil: Low combustion chamber temperatures during prolonged idling lead to incomplete fuel burn. Unburnt fuel washes past piston rings into the oil pan, diluting the motor oil and breaking down its protective viscosity.
-
Carbon Deposit Accumulation: Low cylinder temperatures cause carbon soot to build up on intake valves, spark plugs, catalytic converters, and oxygen sensors.
-
Cooling System and Alternator Strain: Stationary idling starves radiators and oil coolers of natural airflow, forcing electric fans, water pumps, and high-output alternators to run continuously at maximum capacity.
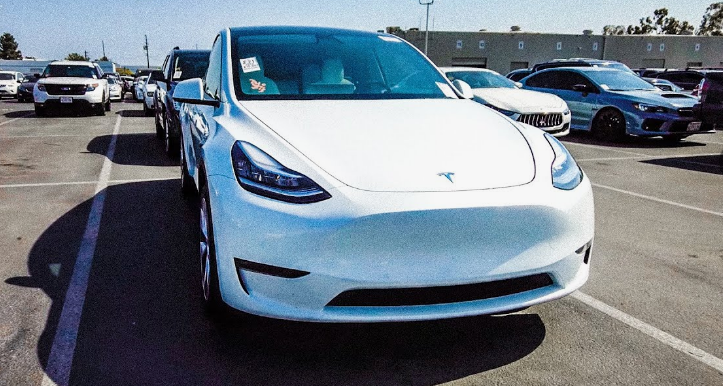
2. The Ford & General Motors Engine Idle Hour Conversion Rules
To standardize fleet maintenance schedules, major automotive manufacturers established engineering conversion formulas to equate idle hours to equivalent driving miles.
The Standard Fleet Conversion Formula
-
1 Idle Hour = 33 Miles (approx. 53 km) of Engine Wear
Real-World Example Comparison
Consider two identical retired 2018 Ford Police Interceptor Utilities listed in an auction catalog:
| Metric | Vehicle A (Administrative Fleet) | Vehicle B (Patrol Unit) |
| Odometer Mileage | 85,000 miles | 85,000 miles |
| Engine Idle Hours | 400 hours | 4,200 hours |
| Idle Hour Conversion | $400 \times 33 = 13,200 \text{ miles}$ | $4,200 \times 33 = 138,600 \text{ miles}$ |
| True Mechanical Engine Wear | 98,200 equivalent miles | 223,600 equivalent miles |
Although both vehicles display identical 85,000-mile odometer readings, Vehicle B’s engine has experienced more than double the mechanical wear of Vehicle A.
3. How to Check Idle Hours in Common Auction Models
Modern digital instrument clusters display idle metrics directly through the driver information screen:
+-------------------------------------------------------------------------------+
|                      DIGITAL CLUSTER IDLE METRIC CHECK                         |
+-------------------------------------------------------------------------------+
| [Ford Interceptor / Explorer]  --> Steering Wheel Menu > System Check > Hours |
| [Chevrolet Tahoe / Caprice]    --> Trip Odometer Button > Hold for Engine Hrs |
| [Dodge Charger Pursuit]       --> Performance Pages / Vehicle Info > Engine   |
+-------------------------------------------------------------------------------+
-
Ford Police Interceptor Utility / Sedan: Use the left steering wheel directional pad to navigate to
Settings$\rightarrow$Information$\rightarrow$Engine Hours/Engine Idle Hours. Ford displays both total running hours and specific idle hours. -
Chevrolet Tahoe PPV / SSV: Cycle through the trip odometer stalk on the dash or steering wheel menu until
Engine Hoursappears on the digital display. -
Dodge Charger Pursuit: Use the steering wheel controls to access the
Vehicle Infomenu on the cluster or central Uconnect screen to viewEngine Hours.
4. Specific Engine Failures Caused by Excessive Idling
High idle hours on specific public auction platforms point to well-documented mechanical risks:
-
Dodge Charger / Durango (5.7L HEMI V8): High idle hours combined with low oil pressure lead to roller lifter bearing failure, which destroys the camshaft lobes (the classic "HEMI Tick").
-
Ford Police Interceptor (3.5L / 3.7L Cyclone V6): Extended idling accelerates internal water pump bearing wear and timing chain stretch, increasing the risk of coolant leaking into the crankcase oil.
-
Chevrolet Tahoe (5.3L EcoTec3 / Vortec V8): High engine hours accelerate wear on the Active Fuel Management (AFM) displacement-on-demand lifters, leading to stuck lifters and cylinder misfires.
Summary Buyer Rules for Engine Hours
-
Always Check the Hours First: On police and emergency fleet assets, engine hours are more important than odometer mileage when setting your bid ceiling.
-
Apply the 33-Mile Rule: Calculate total equivalent mileage before comparing auction prices against private market sales data.
-
Budget for Valvetrain Services: If buying a unit with over 3,000 idle hours, hold back $500–$1,500 in your contingency budget for timing components, water pumps, or lifter services.
When evaluating vehicles at public and government auto auctions, the Vehicle Identification Number (VIN) is your single most important diagnostic tool. A VIN is a unique 17-character alphanumeric code that acts as a vehicle's legal fingerprint.
For auction buyers, decoding the VIN allows you to verify factory specifications, confirm original engine options, detect fraud, and pull accurate vehicle history reports before placing a bid.
1. Breakdown of the 17-Character VIN Structure
Standardized by the National Highway Traffic Safety Administration (NHTSA) and ISO standards, every 17-character VIN is divided into distinct sections that reveal specific manufacturing data:
+-------------------------------------------------------------------------------+
|                       17-CHARACTER VIN STRUCTURE LAYOUT                       |
+-------------------------------------------------------------------------------+
| Pos  1–3  : World Manufacturer Identifier (WMI)                               |
| Pos  4–8  : Vehicle Descriptor Section (VDS - Model, Body, Engine Type)        |
| Pos   9   : Check Digit (Security Validation Math)                            |
| Pos  10   : Model Year (Year Code)                                            |
| Pos  11   : Plant Code (Assembly Location)                                    |
| Pos 12–17 : Vehicle Identifier Section (VIS - Sequential Serial Number)       |
+-------------------------------------------------------------------------------+
2. Deciphering Key VIN Sections
A. World Manufacturer Identifier (WMI) — Positions 1 to 3
Indicates the country of origin, manufacturer, and vehicle division.
-
1, 4, or 5: Built in the United States (e.g.,
1FA= Ford Motor Company, USA). -
2: Built in Canada (e.g.,
2FM= Ford Motor Company, Canada). -
3: Built in Mexico (e.g.,
3FA= Ford Mexico). -
J: Built in Japan.
-
K: Built in South Korea.
B. Vehicle Descriptor Section (VDS) — Positions 4 to 8
Describes the vehicle's model line, body style, brake system, trim, and exact engine specification.
-
Why it matters at auctions: Sellers or third-party auction listings sometimes misidentify engine sizes (e.g., listing a V6 as a V8 or an AWD unit as FWD). Position 8 specifies the exact factory engine code. For instance, on a Ford Police Interceptor Utility, position 8 distinguishes between the naturally aspirated 3.7L V6 (
8) and the twin-turbo 3.5L EcoBoost V6 (T).
C. The Check Digit — Position 9
Position 9 is a mathematical security code calculated using a specific weight-factor formula applied to the remaining 16 characters.
-
Why it matters at auctions: The check digit prevents VIN tampering and fake paperwork. If a VIN check tool flags a check digit error, the VIN plate on the vehicle may be counterfeit or mistyped on the title documentation.
D. Model Year Code — Position 10
Represents the official vehicle model year (not necessarily the manufacture date):
| Code | Year | Code | Year | Code | Year |
| A | 2010 | G | 2016 | N | 2022 |
| B | 2011 | H | 2017 | P | 2023 |
| C | 2012 | J | 2018 | R | 2024 |
| D | 2013 | K | 2019 | S | 2025 |
| E | 2014 | L | 2020 | T | 2026 |
| F | 2015 | M | 2021 | V | 2027 |
(Note: The letters I, O, Q, U, and Z are never used in VINs to avoid confusion with numbers).
3. Where to Locate Physical VIN Stamps During Inspection
When inspecting a vehicle in person on preview day, always verify that the physical VIN stamps across different areas of the vehicle match each other and match the paperwork character for character:
-
Dashboard Plate (Primary): Visible through the lower driver-side corner of the windshield glass.
-
Driver-Side Door B-Pillar Sticker: The federal safety certification label located on the driver door jamb.
-
Engine Bay Firewall / Strut Tower: Stamped directly into the metal body frame or firewall.
-
Underbody Frame Rail: On trucks and body-on-frame SUVs (e.g., Chevrolet Tahoe, Ford F-150), the VIN is often stamped onto the outer frame rail under the passenger side.
4. VIN Fraud and Red Flags at Auto Auctions
In public asset liquidations and tow-yard auctions, VIN discrepancies require immediate attention:
-
Mismatched VIN Plates: If the dashboard VIN plate does not match the door jamb sticker or title paperwork, do not bid. This indicates a re-vinning attempt, stolen vehicle components, or major unrecorded body repairs using donor vehicle parts.
-
Scratched or Loose Dashboard Rivets: Factory VIN plates are attached using specialized rosette-shaped rivets. Standard round pop-rivets or scratch marks around the plate suggest the VIN plate was removed or replaced.
-
Obscured or Missing Door Stickers: Missing door jamb stickers often point to extensive bodywork and repainting following severe side-impact collisions.
Summary VIN Checklist for Auction Buyers
-
Copy the VIN from the Dash: Write down or photograph the VIN directly from the physical vehicle rather than relying solely on the auction catalog printout.
-
Decode Position 8 and 10: Confirm the true factory engine size and official model year before running price estimates.
-
Cross-Check Paperwork: Ensure the VIN on the auction invoice, title, and physical vehicle match perfectly before taking delivery.
In the fast-paced environment of government surplus liquidations and public auto auctions, knowing when not to bid is just as important as identifying a good deal. Because public auctions sell vehicles strictly on an "As-Is, Where-Is" basis without consumer warranties or returns, winning a lot with major hidden defects can lead to financial losses.
While minor cosmetic blemishes or flat batteries are expected on retired fleet units, certain mechanical and structural red flags signal high-cost repairs that exceed the vehicle's market value. Here are 5 critical deal-breakers every auction bidder must watch for during preview inspections.
1. Milky Oil or Oil in the Coolant Reservoir
Checking fluid condition is the most important step when opening the hood during preview day.
+-------------------------------------------------------------------------------+
|                       FLUID CONTAMINATION CHECKPOINTS                         |
+-------------------------------------------------------------------------------+
| [Oil Dipstick / Filler Cap]  --> "Milkshake" texture = Coolant mixing in oil   |
| [Coolant Expansion Tank]     --> Brown sludge / oil film = Head gasket failure|
+-------------------------------------------------------------------------------+
-
What it means: A light-brown, "milkshake-like" emulsion under the oil cap or on the dipstick indicates coolant is leaking into the engine oil pan. Conversely, brown sludge or an oil film in the coolant tank signals oil pressurized into the cooling system.
-
The Root Cause: Blown head gaskets, cracked engine blocks, or internal water pump seal failures (common on Ford 3.5L/3.7L Duratec engines found in Police Interceptor Utilities).
-
Why Walk Away: Repairing internal engine contamination typically requires complete engine teardowns or full engine replacements ($2,500 to $5,000+), quickly eliminating any auction savings.
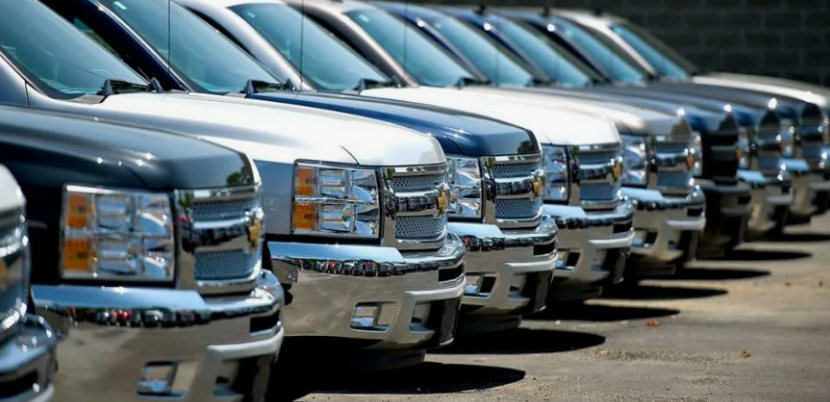
2. Structural Frame Rot or Buckled Frame Rails
While light surface oxidation on exhaust heat shields or steel wheels is normal, severe structural corrosion or frame deformation is a major deal-breaker.
-
What to check: Look under the front and rear bumpers to inspect the main frame rails, subframes, and suspension mounting points. Check for flaking, perforated rust holes, or fresh undercoating sprayed over crumbling metal.
-
Buckled Metal / Rippled Rail Gaps: Uneven gaps between body panels combined with rippled metal on the frame rails indicate past high-speed collision damage that was never properly straightened on a frame bench.
-
Why Walk Away: Vehicles with compromised frame rails cannot pass state safety inspections, suffer structural failures during crashes, and cannot be aligned properly, causing unsafe driving behavior and rapid tire wear.
3. Disconnected, Missing, or Tampered Warning Lights
During the initial preview, turn the key to the Ignition ON position (Position II) without starting the engine to trigger the instrument cluster self-test.
| Cluster Warning Lamp | Standard Self-Test Behavior | Red Flag Behavior | Potential Cost |
| Check Engine (MIL) | Illuminates 2–5 seconds, then shuts off. | Does not illuminate at all. | Black electrical tape over bulb or removed LED to hide active diagnostic codes. |
| ABS / Traction | Illuminates briefly, then shuts off. | Stays permanently lit. | Failed ABS pump module, wheel speed sensors, or hydraulic control unit ($400–$1,200). |
| Airbag (SRS) | Illuminates briefly, then shuts off. | Stays permanently lit or flashes. | Previously deployed or missing airbags from unrecorded collisions ($800–$2,000). |
-
Why Walk Away: If a seller or previous operator tampered with the cluster to conceal active trouble codes, you cannot determine the mechanical health of the engine, transmission, or safety systems without an advanced OBD-II diagnostic scanner.
4. Chopped Electrical Harnesses and "Wire Tufting"
Retired government fleet units (police cruisers, utility trucks, fire department service vehicles) undergo equipment removal before public auction. Professional fleet mechanics unbolt equipment cleanly, but rushed removals leave severe wiring damage behind.
-
What to look for: Look under the dashboard, glove box, center console, and trunk floor.
-
Severed Main Harnesses: If emergency lighting, radios, or siren modules were removed by cutting directly through main factory wire looms rather than unplugging connectors, you will face severe electrical glitches.
-
Why Walk Away: Tracking down parasitic battery drains, short circuits, non-functioning power windows, or blown main fuses caused by cut factory harnesses can take dozens of hours of electrical troubleshooting or require a full dashboard harness replacement ($1,000–$2,500).
5. "Bill of Sale Only" or Unclear Title Paperwork
Mechanical problems can be fixed with parts, but paperwork defects can permanently prevent a vehicle from being driven legally on public roads.
-
What to verify: Review the catalog description for title status keywords before bidding:
-
❌ "Bill of Sale Only / No Title"
-
❌ "Junk Certificate / Parts Only"
-
❌ "Certificate of Destruction"
-
-
Why Walk Away: In many jurisdictions, obtaining a clean, registrable title for a vehicle sold without paperwork requires lengthy court-bonded title procedures, state police inspections, and administrative fees that often exceed the value of the vehicle. A vehicle marked "Parts Only" or "Certificate of Destruction" can never be legally registered or insured for road use.
Summary Red Flag Checklist for Auction Preview Day
-
Check the Oil Cap: Walk away if you see milky brown foam or sludge.
-
Inspect Frame Rails: Walk away if you find rust holes, frame buckling, or fresh undercoat hiding structural rot.
-
Run Ignition Self-Test: Walk away if the Check Engine light fails to illuminate during ignition key-on.
-
Inspect Under-Dash Wiring: Walk away if the factory wiring loom has been cut or stripped away.
-
Verify Title Eligibility: Walk away from "Bill of Sale Only" lots unless buying purely for spare mechanical parts.
- Common Hidden Costs When Buying Vehicles at Public Auto Auctions
- Popular Models at Government and Public Auto Auctions: What Bidders Should Know
- Online vs. Physical Auto Auctions: Key Differences, Risks, and Bidding Tactics
- Valuation and Strategy: How to Value Vehicles at Government Auctions and Set Maximum Bids
